To import a new project from a Project desktop client file, follow these steps.
- Open Project Hub P3M or Admin Hub
- Select Project from left navigation and open then project view
- On the ribbon, select Import > Import from MPP

- Update the Work hour template, Project manager, and Schedule mode fields as required.
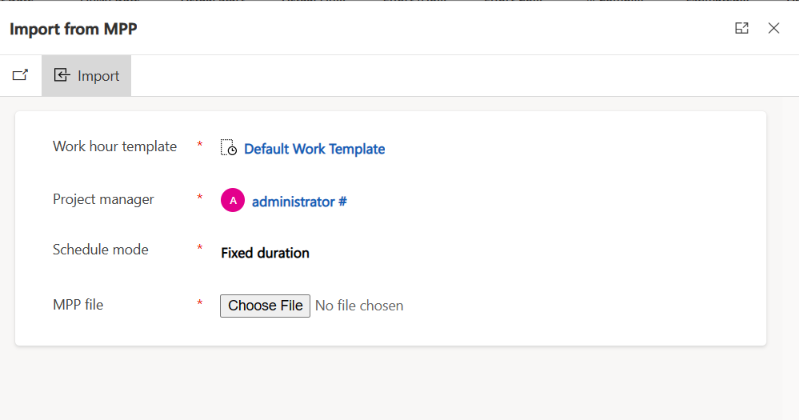
- Select Choose File, browse to the .mpp file that you want to import, and then select Open.
- Select Import to start the import process.
- After the project is successfully created, review the validation summary. The summary indicates whether any items in the file excluded from the import. For example, the following screenshot shows an example where nine resources were removed from the importation.
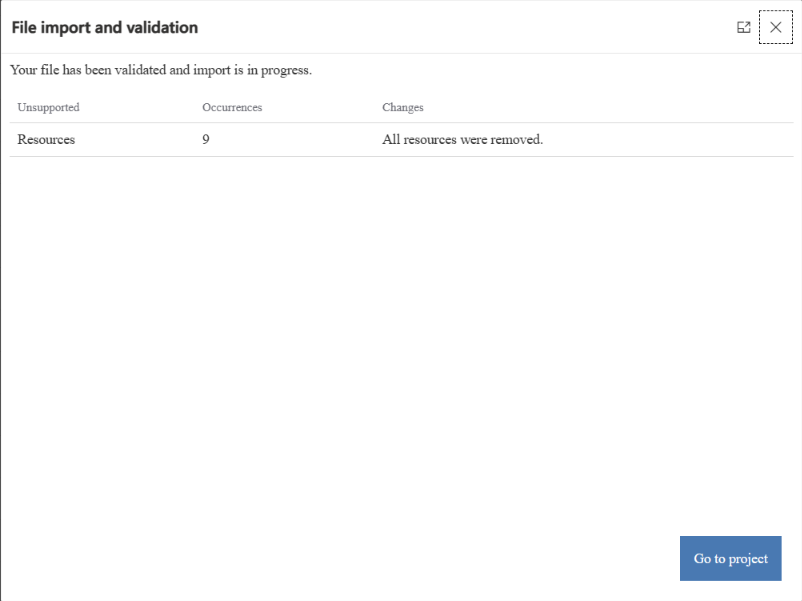
- Select Go to project to view the project.
Limitations
The following sections describe limitations of Import from MPP.
Project for the web is great for most projects, but it isn't a complete replacement for Project desktop. Some features aren't supported and can't be migrated. Therefore, before you begin, you should evaluate your project and make sure it doesn't rely on them. For a list of these features, see Features that don't migrate.
Note
This list might not be exhaustive. If your new Project for the web project is missing elements or data, they might rely on an unsupported feature that isn't listed.
In addition to the unsupported capabilities that are described in the previous section, the work breakdown structure (WBS) must conform to the existing limits.
If you've customized the project main page by adding required fields, those fields must have default values. Otherwise, errors occur when files are imported to create new projects. Customization of the import dialog box isn't currently supported.